Showing posts with label craft. Show all posts

Wednesday, October 22, 2014

Love for Grandpa

We all know I'm an overly nostalgic person, but I've been feeling particularly connected to my grandpas lately. Last week, our kids' school celebrated their first annual Country Fair. (It was awesome.) Our PTA president, myself and many other parents from our school are also alums and we opted to bring back the Country Fair theme (to replace the Medieval Faire, because really, what about the Medieval time period screams "children's fair"?), but also because the Country Fair was the theme of our youth. Again with the nostalgia. The fair was great; a lot of work, but also a lot of fun. I was in charge of game booths. It was a great job for me and a crummy job for me. I loved deciding on the games, naming them, creating them and working with our co-chairs on the layout. But I despise nagging people to work their one-hour shifts. Yuck. Yuck. Yuck. As the fair got closer, I was more and more unhappy with the job, so I decided to do a little something for myself, and this is what I came up with:


Sorry those pictures aren't great. For some reason it never occurred to me to take a picture of them. I know. Duh.

The whole process got me thinking a lot about my grandpas. My dad's dad, Grandpa Bill, was a sign maker by profession. He created the stencils which would be used to paint a sign on, say, the side of a truck, for example. And he was a calligrapher and lover of all things hand-made. In his retirement, he perfected calligraphy, jewelry making, painting, copper on enamel plates (some of which are hanging in my dining room to the left of me as I write), gold leaf and furniture restoration, just to name a few. From him I inherited my love of all things hand-made and a love for the process of creating something with my own two hands, as well as the appreciation for things made by others. I especially learned a love for creative, beautiful lettering. I wish I had a fraction of the talent he had and hope that some day I will have the time to practice and focus more on the art. I also inherited from Grandpa Bill a desire for perfection, which is something I fight against every day! :) This project was meant to look "unperfect" so it was great for me!

Thinking about Grandpa Bill also got me thinking about my Grandpa Joe, my mom's dad, whom I knew much better. From Grandpa Joe I inherited my love for sports, particularly baseball. He was a wonderful athlete, who would be so proud to see his grandson (who bears his name) finally excelling at sports and really learning to love the game. We also share a love for Boston, his hometown, which we never visited together. I hope that my own parents have the chance to share their hometowns with their grandchildren. What better way to learn their history and stories. And my gramps loved to tell a story. From him I learned the joy of hearing and telling a great story (sometimes over and over to the same people). We love to make people smile. And the man cried. A lot. Nostalgic, loving, sentimental, just like his granddaughter. And stubborn as all hell. Yeah, we share that, too.

I'm missing my grandpas terribly lately. How I wish my Grandpa Bill could see that, though I never perfected the art of calligraphy, for nothing I do is ever perfect, I have grown to love the process, and find great joy and peace in the craft. I never see a hand painted sign which doesn't make me think of him. I wonder what he'd think about Pinterest and etsy. In a day and age of quick and cheap and plastic and free shipping, would he appreciate online resources for a reconnection to the past? If he were a generation younger, would he have his tech-savvy son helping him set up his own etsy shop? I wish I'd paid more attention in those calligraphy lessons, lived closer so he could have taught me cloisonné. Taken a trip to Vermont with him to admire the gold leaf signs. And my Grandpa Joe I miss every day. I wear my Boston Red Sox hat for him and wish we could have enjoyed a game at Fenway together just once. He never got to see Zachary play "real" baseball, but I know nothing would make him happier than playing catch with him just one more time. I wonder what he'd think about watching Annalise and Juliette dance. I can hear him laughing and cussing and maybe even doing a little imitation just to get a laugh. But I know he'd be proud of them, too, even proud that his granddaughters are great athletes, too. (He was slow to come around to the idea of girls playing sports... not one of his best traits!!)  I'd love to hear his ridiculous stories just one more time, even the ones I've heard a hundred times, seeing his blue eyes fill with tears. I wish I had another chance to meet both of them again. In my old age, I've realized just how much I learned from each of them. I wish I'd learned that sooner.

On to the signs...

So I stole a pallet. Well, I didn't exactly steal. I asked permission first, then parked illegally, and shoved that puppy into the back of my van. It was much bulkier than I thought and I was glad I'd talked a friend into helping me shove it in. And then Jason took it apart, which really was not a pretty process. At all. Perhaps we should have looked at the online tutorials on how to take apart a pallet first. Anyway, we got it apart and Jason cut 24 pieces, of varying lengths for me. No pictures of this part. Like I said, not so pretty.

Then I painted the pieces poorly. The idea was to make it look like the signs were old, so using a pallet was perfect, as was painting them quickly and sloppily. This was so super easy and fast! (Which was necessary, since this was all done two days before the fair.) I used regular pre-mixed house paint from the hardware store... No time to be picky about colors, though I did add some gray to the blue, as it was a little darker than what I wanted. Here are some of the painted pieces.


You can see how the pallet was perfect for this because it made each piece a little more interesting.

While they were drying, I went to my computer. I wrote out each name I wanted on the signs in Word and then I selected which font I wanted to use for each. This way I could be somewhat brainless about painting and just copy the different fonts. I downloaded a few new fonts for the process (which I love to do anyway). http://www.dafont.com is one of my favorite places to look for fonts. Then once the base paint was dry (top and bottom and all sides, since I knew they'd be seen from every direction) I started to paint. I made eight signs in each color, used white paint to write on the blue and red signs and either blue or red for the white signs. Here was my first sign:


It's one of my favorites, too. I love the hole in the sign. The font for this one was American Typewriter and I used just a cheapo paintbrush that I got at the hardware store for all the lettering. Nothing fancy, just copying the computer! Here's a close up of some of the white on red signs:


See how imperfect they are? It doesn't matter. The impact of all of the signs together was the important part. And the imperfection was a clear reminder that things used to be hand-made. Here they are all together. (Again, sorry for the quality of the pictures. Thank goodness for iPhones, though!)


If you look closely, you see all the imperfections, but as a whole, I think they went with the tone and feel of a small town Americana Country Fair.

To hang them, we next bought two 2 inch (I think!) square long pieces of wood. I banged them up a bit with both sides of my hammer, and then painted them poorly with white paint. We installed them with zip ties to other poles either on the playground or the large rented "town square" tent. My husband pre-drilled holes in each sign approximately in the middle of each one so we could easily install in place with screws. The signs more or less pointed in the direction of the various games.  Here they are again:


A little piece of Americana, twenty minutes from downtown LA, in our own small town USA.

I hope a little bit of nostalgia maybe will bring you some joy as it brought to me!


Wednesday, October 16, 2013

Thanksgiving Placecards

Last year or maybe even (actually probably) the year before that we made these for Thanksgiving.  This is how super on time I am with putting stuff on the blog.  Super on time, like I am with everything.  Tomorrow is the Great Shake Out, where all schools in California practice a major earthquake, with after shocks, injuries, staff fatalities, etc.  Our school needs parent volunteers to come to school tomorrow after the "earthquake" and act hysterical, demand kids whose emergency forms they aren't on, leave their cars running in the middle of the street, etc.  Act like a hysterical parent?  Sign me up!  How fun!  What assignment do I get?  The parent who comes late.  Seriously.  That's not fun, that's real life.  I was typecast.  So unfair.

Anyway, I digress.  It's fall, so I thought I'd show these little cuties we made for Thanksgiving some year.  Who knows which one?


I got this idea from somewhere.  Certainly I'm not running on enough brain cells right now to think of something like this on my own.  Maybe we credit Martha Stewart just in case.

These were really simple.  We have tons of liquid amber trees in our town, which drop these little spiky balls.  We went on a walk and the kids collected tons of these.


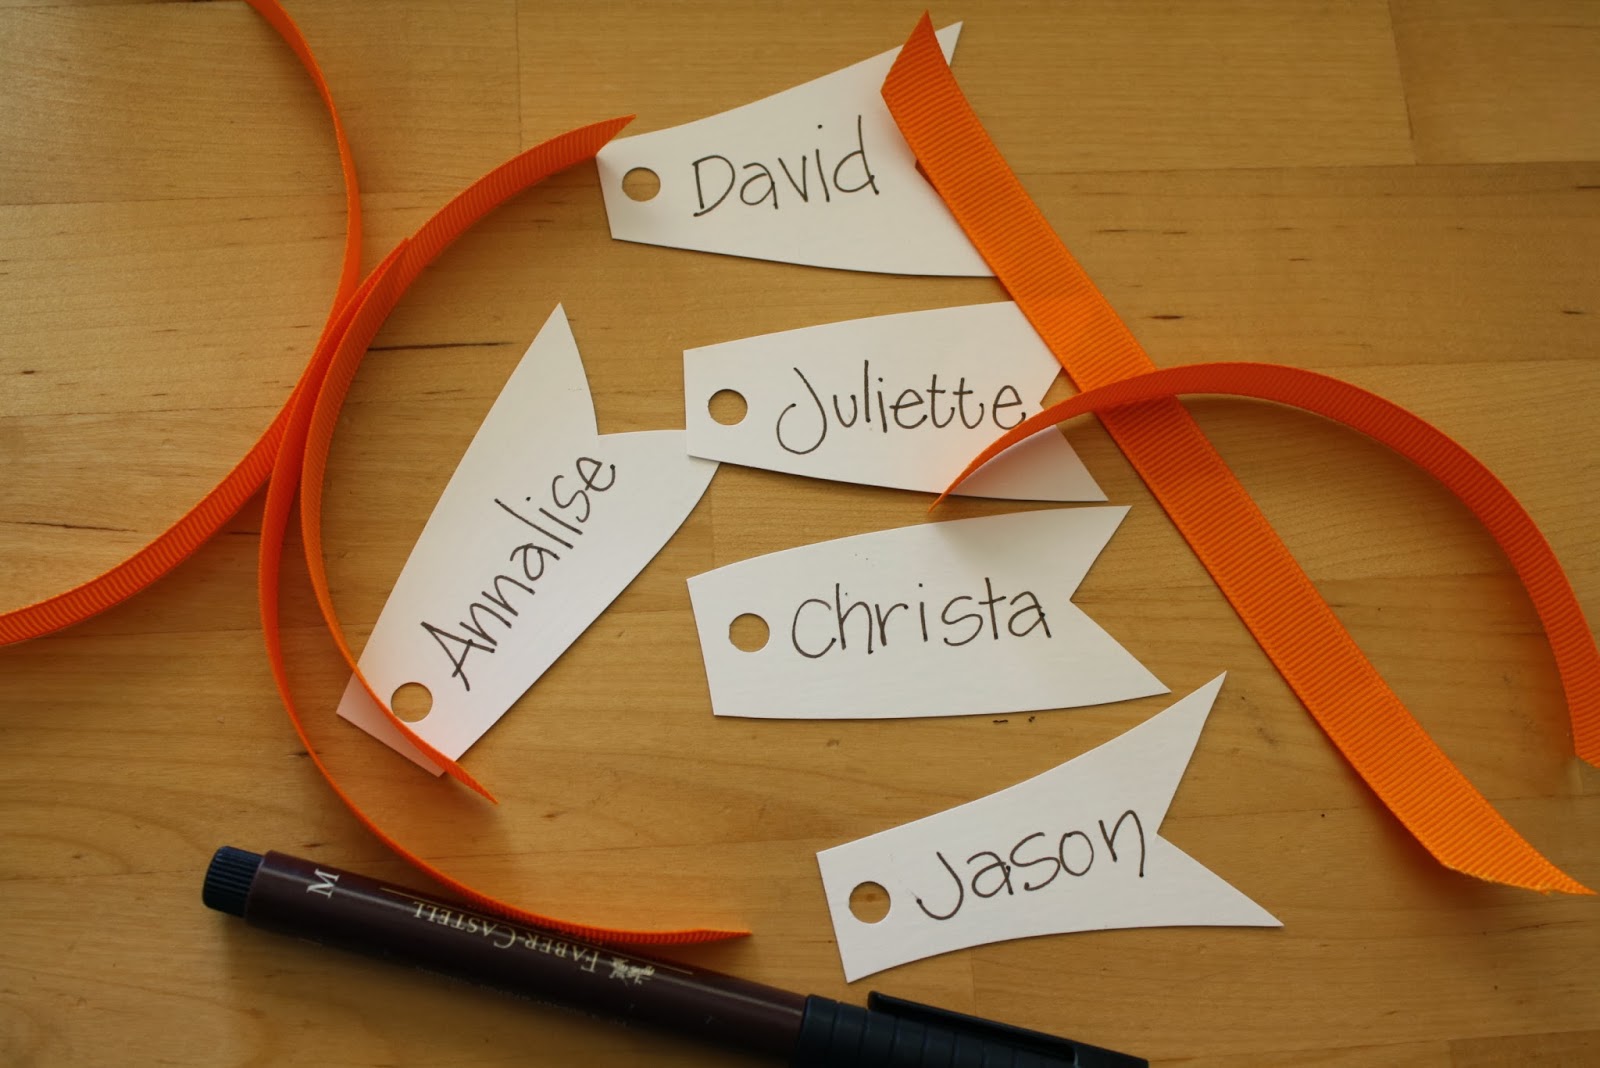
Apparently we needed a ton because these babies do not like to sit up straight.  Lazy little bastards.  The rest of this is pretty easy.  I made little flags out of card stock.  I just free-formed them because I wanted them to each be a little different.  Then I punched a hole in each flag and wrote the names on each one.  I used a thin, orange grosgrain ribbon for the ties.  I cut them short enough to just tie them once.


The last step was to just tie each one around the little buggers that were the most agreeable.  The tying was a bit tricky.  I tied them mostly all the way and then slid them down the stem and tightened the knot.  This way I was able to get the names to stay right where I wanted it on the stem.  We laid/sat/rested them right on the plates on our Thanksgiving table.  And done!  Happy Thanksgiving!


Thursday, October 10, 2013

Halloween Mantle


It’s fall!  Well, at least my calendar tells me it is.  It’s sunny and beautiful outside, but it is over 90 degrees as I write this.  So not really feeling super fall-like here in Southern California.  All the same, Halloween is a few short weeks away and it was time to bust out the decorations.  I finally retired the rainbow wreath from the front door.  It’ll make a resurrection in the spring.  I’m hoping to make a new fall wreath for the front door, but for now there’s a thrift store “Happy Halloween” wreath.  

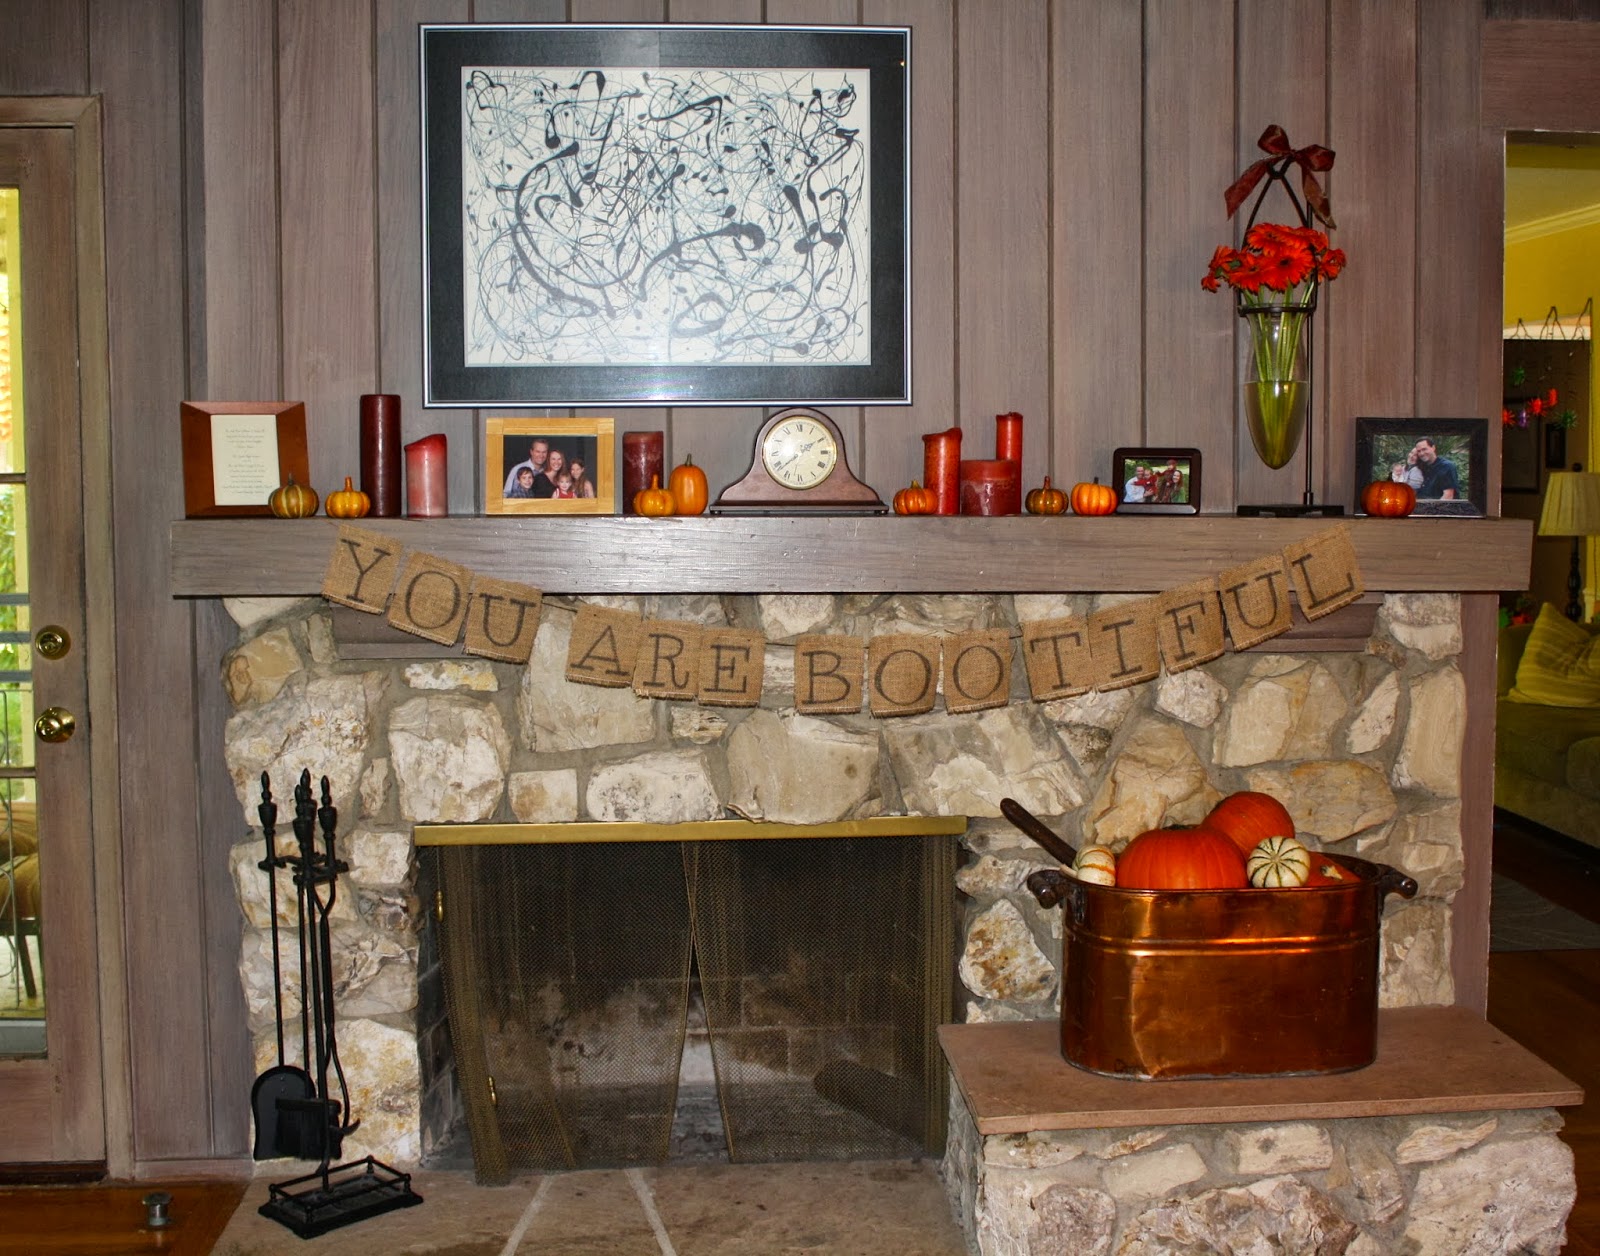
Here’s what our family room fireplace looks like right now:


(a little more close up)

I made the sign last year when I hosted a Stella & Dot trunk show in the weeks before Halloween.  Since Halloween is such an over-the-top holiday, I like to keep it pretty simple… the only additions are a ribbon on the vase stand, orange flowers (Trader Joe’s), fake pumpkins (thrift store), real pumpkins (Trader Joe's and the kids' Harvest Festival at their school and the sign.

The copper pot which holds the pumpkins resides permanently on this weird  totally unfunctional bench-thing next to our fireplace.  It's not a lid there that you can lift to store stuff and you can't sit on it without hitting your head.  It mostly serves as a hard place in which to bump your shin if you round the corner too tightly.  So when my friend gave me this antique copper washing basin and laundry stir-er I knew the perfect spot for it!  It is not entirely filled with pumpkins.  I cheated and loaded pillows in the bottom and filled the top with pumpkins.  I think it looks beautiful filled with pumpkins!


Sorry I don’t have pictures of me making the sign, but it was so simple.  First, I decided how big I wanted each piece of burlap to be.  To do this, I first had to measure my mantle and decide approximately how much of a dip I wanted the twine to make.  Our mantle is quite long, so our twine is cut to about 6 ½ feet long.  (Full disclosure, I’m a math tutor, but I don’t trust myself, so I actually cut the twine longer just in case.)  Then I had to divide the length of twine the amount of letters.  (78 inches divided by 14 equals 5.6.)  I decided on about 5 inches across to leave room for spaces and at either end for hanging.


Then, to cut burlap in a straight line, (wish I had a picture for this), find the line where you want to cut, then pull the string at that line.  Pull, pull, pull until you have pulled that string out all the way across your length of burlap.  Then cut along that line.  This will give you a nice, even length for your letters.  These are a little more than 5 ½ inches long.  Then I measured them and cut the widths.  These are approximately five inches wide, though they vary.  (See below.)


Next, I typed on the computer what I wanted the sign to say.  Then I chose the font.  For this, I chose “American Typewriter”.  To write each letter, I enlarged the letters so that each letter was quite large.  Then I just used a black Sharpie to copy the letters.

Some of the letters weren’t quite centered in the square, so I trimmed the width on some of the letters.  Then I took my hole punch and punched two holes in each piece of burlap.  These are approximately an inch and a half in from each side and about an inch down from the top.


To thread the twine through, I folded the twine and pulled it through, starting with the middle letters on either side and ending with each end.  (In other words, I started with B and worked backward to Y and then O and worked forward until the L.)  Then I hung it with the very sophisticated Scotch tape on my mantle and covered the ends with my fake pumpkins.  Then I straightened out the letters and voila!  Happy Halloween!