Showing posts with label twine. Show all posts

Thursday, October 10, 2013

Halloween Mantle


It’s fall!  Well, at least my calendar tells me it is.  It’s sunny and beautiful outside, but it is over 90 degrees as I write this.  So not really feeling super fall-like here in Southern California.  All the same, Halloween is a few short weeks away and it was time to bust out the decorations.  I finally retired the rainbow wreath from the front door.  It’ll make a resurrection in the spring.  I’m hoping to make a new fall wreath for the front door, but for now there’s a thrift store “Happy Halloween” wreath.  

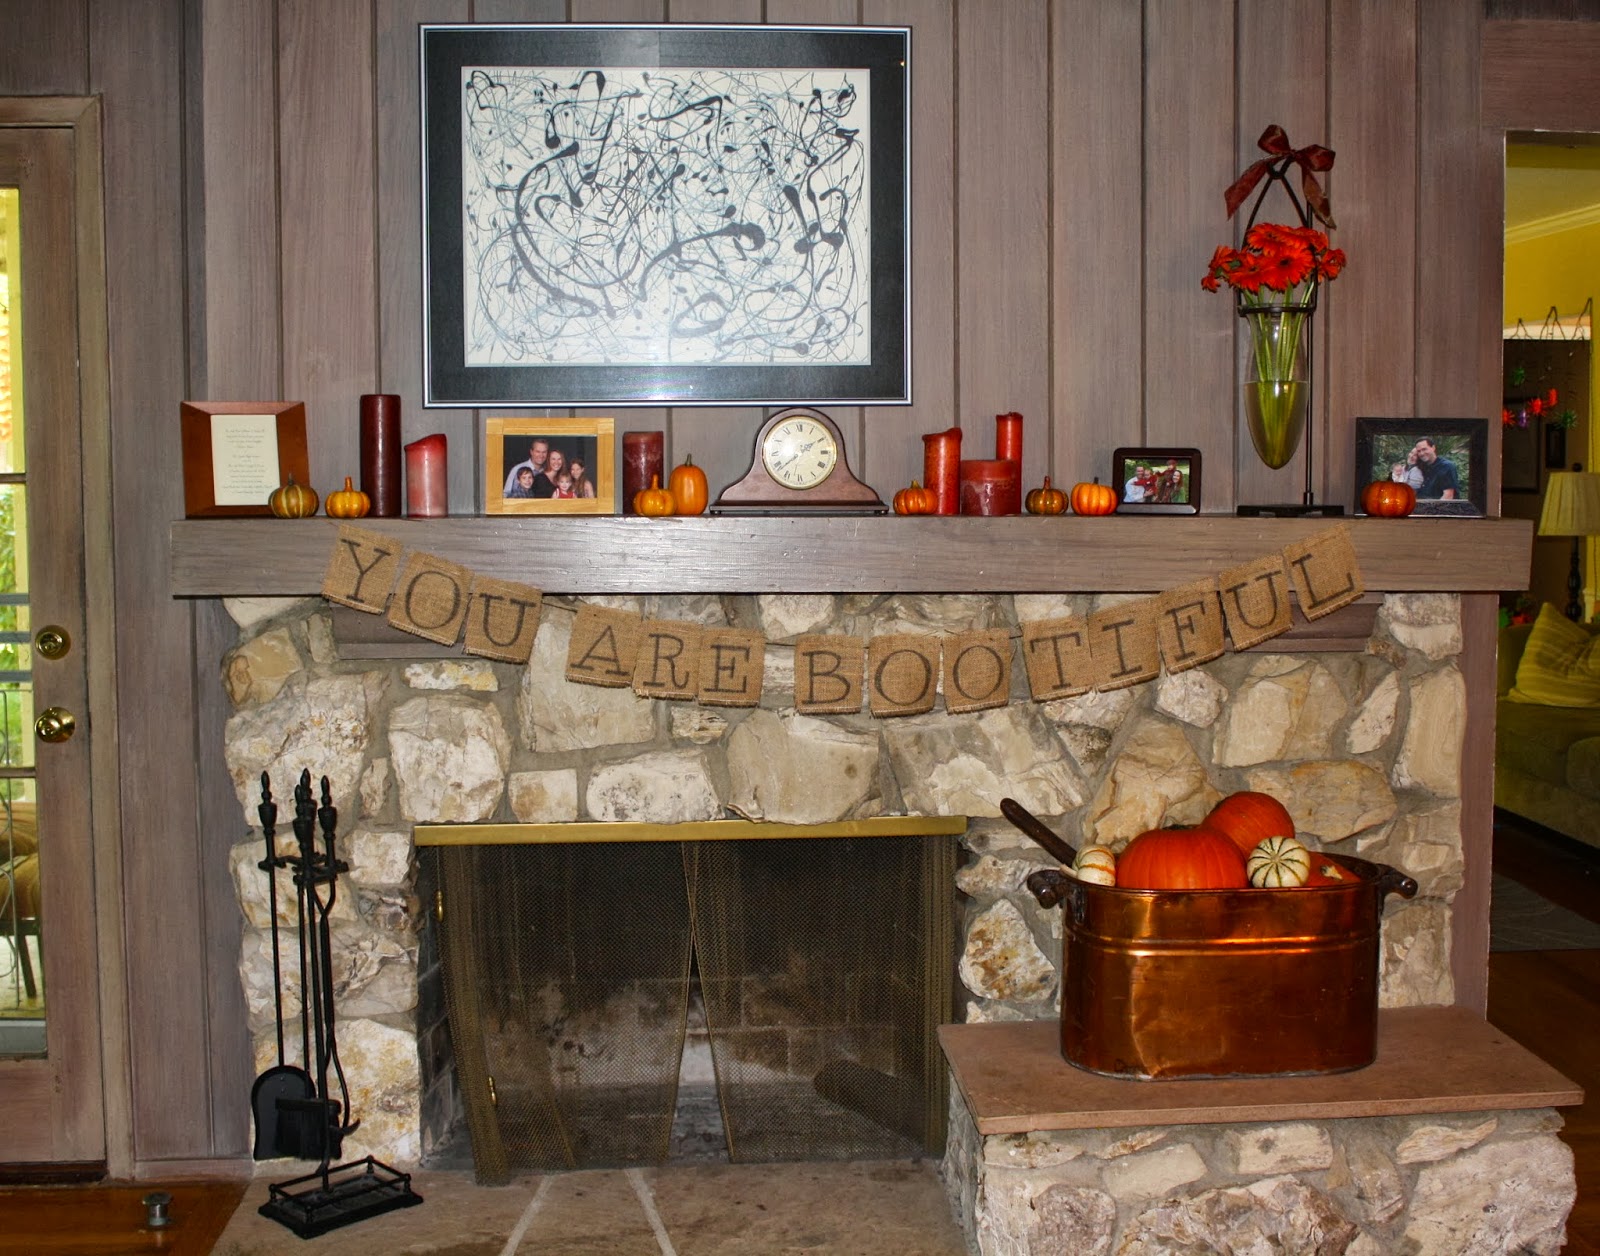
Here’s what our family room fireplace looks like right now:


(a little more close up)

I made the sign last year when I hosted a Stella & Dot trunk show in the weeks before Halloween.  Since Halloween is such an over-the-top holiday, I like to keep it pretty simple… the only additions are a ribbon on the vase stand, orange flowers (Trader Joe’s), fake pumpkins (thrift store), real pumpkins (Trader Joe's and the kids' Harvest Festival at their school and the sign.

The copper pot which holds the pumpkins resides permanently on this weird  totally unfunctional bench-thing next to our fireplace.  It's not a lid there that you can lift to store stuff and you can't sit on it without hitting your head.  It mostly serves as a hard place in which to bump your shin if you round the corner too tightly.  So when my friend gave me this antique copper washing basin and laundry stir-er I knew the perfect spot for it!  It is not entirely filled with pumpkins.  I cheated and loaded pillows in the bottom and filled the top with pumpkins.  I think it looks beautiful filled with pumpkins!


Sorry I don’t have pictures of me making the sign, but it was so simple.  First, I decided how big I wanted each piece of burlap to be.  To do this, I first had to measure my mantle and decide approximately how much of a dip I wanted the twine to make.  Our mantle is quite long, so our twine is cut to about 6 ½ feet long.  (Full disclosure, I’m a math tutor, but I don’t trust myself, so I actually cut the twine longer just in case.)  Then I had to divide the length of twine the amount of letters.  (78 inches divided by 14 equals 5.6.)  I decided on about 5 inches across to leave room for spaces and at either end for hanging.


Then, to cut burlap in a straight line, (wish I had a picture for this), find the line where you want to cut, then pull the string at that line.  Pull, pull, pull until you have pulled that string out all the way across your length of burlap.  Then cut along that line.  This will give you a nice, even length for your letters.  These are a little more than 5 ½ inches long.  Then I measured them and cut the widths.  These are approximately five inches wide, though they vary.  (See below.)


Next, I typed on the computer what I wanted the sign to say.  Then I chose the font.  For this, I chose “American Typewriter”.  To write each letter, I enlarged the letters so that each letter was quite large.  Then I just used a black Sharpie to copy the letters.

Some of the letters weren’t quite centered in the square, so I trimmed the width on some of the letters.  Then I took my hole punch and punched two holes in each piece of burlap.  These are approximately an inch and a half in from each side and about an inch down from the top.


To thread the twine through, I folded the twine and pulled it through, starting with the middle letters on either side and ending with each end.  (In other words, I started with B and worked backward to Y and then O and worked forward until the L.)  Then I hung it with the very sophisticated Scotch tape on my mantle and covered the ends with my fake pumpkins.  Then I straightened out the letters and voila!  Happy Halloween!

Sunday, June 16, 2013

Mason Jar Plants

Happy summer everyone!  I hope you are as happy as I am that the end finally came!  I can breathe.  I can relax.  All the dishes in the kitchen are washed for the first time in weeks.  My children like each other again.  Granted we are only three days in, but I am a much happier person than I was last week.  More on our end of the school year later.  For now, I want to show you what I made as end of the year thank you gifts for our preschool parent board.

Last year, my friend Amber was president of the parent board, and, feeling generous, she gave every member of the parent board a pair of flip flops.  Super cute.  Summery.  Useful.  But at $5 apiece (at best) times 25 members of the board, that's a little more money than I wanted to spend.  Plus, I couldn't do flip flops again.  I searched all around and couldn't come up with anything cute for more like $2 per gift.  So I decided I'd make something myself.  Of course I went with my old standby: the mason jar!  This is one of the easiest projects I've ever done, and I think they turned out pretty cute.


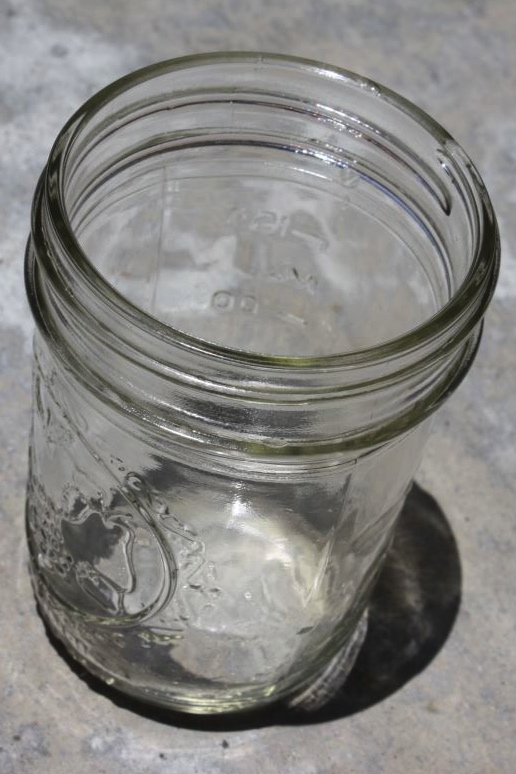
Hello, old friend!  I went with a cute, half pint size.  I didn't want something too big to take up too much space.  This little guy is perfect for a kitchen window.


I filled the bottom with a mixture of those decorative shiny glass rock thingys that we purchased and some shiny real rocks that Annalise had in her "treasure box" from preschool.  She just finished fourth grade.  She wasn't too heartbroken to part with some of her treasures.  The rocks at the bottom give you a little bit of a drainage so that the roots don't get too soggy.  (These are technical terms here.  Can you tell I'm a real gardener?)


I didn't want to put too many in; just enough to cover the bottom.  OK, get ready.  Things are about to get really complicated.  Jason bought me six packs of impatiens.  I removed each flower, broke apart the roots a bit and shoved it into the jar.


You see what I mean.  It's a good thing I'm such an experienced gardener and I never, ever kill plants.  Ever.  This took some serious skill.


I gently punched down the soil a bit, just so it all fit in nicely, but really I couldn't have planned that any better.  (And believe me, I really hadn't planned for that to be that easy.)  I didn't even have to use any additional potting soil.


I put my old file folders to use again.  This time I traced a small glass to make circles.  (This part made me yearn a bit for one of those circle punches, I have to admit.)  But I LOVE reusing something I already have, especially something that has literally been sitting in a cabinet for eleven years.


They're not perfect, just like me!


Then I just personalized each one.  And got out my twine, my other old standby.


Here's the finished product!  Cute, isn't it?  And not bad for less than $2 apiece.


And here they are, ready to go to the parent board meeting.  They held up better than I did, and I can attest that, two weeks later, they are still going strong!  Woo hoo!  One of our board members is still on a trip to Spain (lucky duck), so I'm managing to keep hers alive until she returns.  And if I can keep one alive, then surely the others are still kickin'.  At the meeting I was a blubbering mess, as you can imagine.  It's not even my last year there.  I don't even want to think about next year.  Puddles.  It won't be pretty.  I'll have to come up with something really clever to give my girls next year.  They are an awesome board, who deserve a little something pretty.

Saturday, January 12, 2013

Zachary's Campout Party

No one ever accused me of being on time.  Ever.  Not my forte.  My poor husband and in laws have had to learn how to deal with my lateness.  It's bad.  So here I am, six months later, posting about Zachary's seventh birthday party.  Which was in July.  At least I'm getting to it, which is more than I can say for anything that happened last year.

Zachary reeeeaaaaallllly wanted a sleepover party, so, since his birthday is in the summer, we decided that a campout would be perfect!  I loved sleeping in the tent in the backyard when I was a kid, and I knew he would too.  It was a super easy party to plan and execute and was inexpensive, too.  And the bonus was that my husband Jason and one of our friends, Bryan, did most of the heavy lifting!  Yes!  Totally my kind of party!

We started off with the invitations.  Every year for birthday party invitations, I've done a picture of the birthday kid doing something related in some way to the theme of the party.  But for this party, Zachary decided he wanted the invitations to look like a tent.  We found some ideas online.  Here is a link to the Pinterest board where we found much of our inspiration:

http://pinterest.com/mellowlane/campout-party/

I'm not sure if you can just click on that to go to the site.  I'm still a computer moron.  Sigh.  It's on my ever-growing list of things to learn/do.

We started out with our wording, and went with green and brown, which seems perfect for a campout.  Unfortunately Zachary is color blind and couldn't really even tell that we had two different colors.  Oh well.  So I decided on the wording and then printed them out in kind of a triangle shape, to show through the tent flap.  I printed two invitations to a page on white card stock and cut them in half.  (But in the getting-it-right phase, I just used regular printer paper.)  Then I rounded them off and cut a brown piece of brown construction paper to match.  Then I attempted to cut and fold back the "flaps" of the "tent."  This took several tries and a lot of experimentation back and forth between the printer and the "tent."  Here is what it looked like:


That's my paper cutter underneath there.  It's been with me since grad school.  We're tight.  And yes, I'm in my pajamas there.  It was probably about two in the afternoon.  Awesome.  That's how I roll when I'm in craft mode.

We also added a packing list, so the kids would know what to bring.


You see that nasty carpet underneath there?  That's gone now.  Yes!!

Another thing I always do is hand write the envelopes in some kind of cute font.  But I just didn't have the energy to copy that cute camp font.  And now that I've figured out how to load free fonts onto word, I decided to let the computer do the work for that, too.  Look at me.  I know you're impressed.


I had originally thought that I would have the boys immediately tie-dye a shirt to wear for the rest of the party, but the practicality of that shot that idea out the window.  So instead, I bought inexpensive backpacks from Oriental Trading and tie-dyed those ahead of time.  This left the dyeing to just our family, which was probably a smart idea.  My kids had fun tying the rubber bands around the backpacks and taking turns dipping them in the dyes.  We chose different shades of brown and green so we had a kind of camouflage effect.  So here's the thing about tie-dyeing.  It says on the directions how long to put the fabric in the dye.  It helps if you actually follow those directions.  Who knew!?  Needless to say we dipped them in for much shorter amounts of time, so our backpacks turned out really light.  I still think they're really cute.  And then I wrote each boy's name in black fabric pen.


At the last minute, because I had time to spare (i.e. I wasn't freaking out about screwing up another cake.  Curse you birthday cakes!!) I decided we needed a pennant sign on the front door.  I printed out the letters in that cute camp font again.


Unfortunately, despite the fact that I am a high school geometry tutor, spacial awareness is not something I possess.  Sigh.  There was a lot of cussing going on during this frustrating process.  I decided to bag in completely, when I spotted these:


Old file folders.  I think these might even be from grad school.  I think some of them were reused from my mom and are probably as old as I am.  Put those buggers to good use.  They certainly aren't holding social studies guides anymore!


Cut off the labels and cut them in half.  (There's that carpet again.  In the words of three year old Juliette, "See you later, suckah!")


Much easier to use pencil, a ruler and my BFF paper cutter.  As I was at this time, running out of time, I didn't do a cute font on the pennant, but here's the finished sign on the front door:


You can see it's just twine, and the letters are folded over and taped on the back side.  The sign was ever-so-elegantly taped to the door.  It got the job done.

When the boys arrived, they ran around for a bit.  (Obviously.  They are six and seven year old boys.)  And then they prepared for their hike.  Each boy found their backpack and water bottle, also with their name on it (purchased at the dollar store) and a large Ziploc bag for any treasures they found on their hike.  Then they loaded up a smaller baggie with trail mix from the trail mix bar.


My mother-in-law found these old vintage napkins hiding in a linen closet.  Weren't they perfect for the occasion?


A little twine around a mason jar and it's rugged.


The boys loaded their packs and headed out for a hike with the two dads, one leading (or chasing after the runners) and one bringing up the rear (and nagging/encouraging the stragglers).  Lucky us, we have beautiful horse trails that weave in and out of our whole town.  Zachary and Jason had mapped out their route ahead of time and the boys headed out on about a two or three mile hike.  And I didn't go!!!  I had a break.  In the middle of a birthday party.  Shocking.  I don't even remember what I did during that time.  Probably I cleaned.  So maybe it wasn't that exciting.  The boys came back dirty and thirsty and ready to run around some more.  So they did.  We had no other structured activities, so they played in the "fort" (made up of some old blinds, parts to a composter and anything else the kids can find) up the hill in our backyard, played basketball in the driveway and soccer in the cul de sac.  For dinner, we fed them hotdogs, cooked on skewers borrowed from the Girl Scout troop, over a fire pit, borrowed from my friend Michelle, placed on our driveway with camp chairs surrounding it.

For a cake, we decided not to do a cake.  You can't do a campout without s'mores.  And these boys were spending the night.  I was not about to feed them s'mores and cake.  I'm not totally insane.  So Zachary blew out his flaming marshmallow as his friends sang him happy birthday.


Little shout out to my cousin Katy there, a Wagner lacrosse player!

At this point, about half of the boys went home.  The rest of the boys got in their jammies and got into the tent, armed with flashlights and glowsticks, also purchased at the dollar store.


You like our tent?  It's actually my parents' tent and it's muuuuuuch older than I am!  They bought it right after they got married.  I spent much of my youth in that beauty!


This one is ours, a wedding present, but that night it was for Jason and Bryan to snuggle up in.  Or snore the night away.  The girls and I had our own sleepover in my bed.  I didn't sleep much.  Too many elbows on those little people.

In the morning, we served chocolate chip pancakes and kicked those boys to the curb.  I'm still tired when I think of that day.  After each sleepover, I vow it will be my last.  They are just torture.  But Zachary and his friends loved it!  As I said before, it was a really low maintenance, low budget party, but Zachary said it was his favorite!

Wednesday, August 22, 2012

French Themed Bridal Shower

On Saturday we celebrated the wedding of my younger brother, David, to his longtime girlfriend, Diana.  It was a beautiful ceremony, filled with Diana's homemade touches and both D and D's personalities.  My older brother, Bill, officiated and the ceremony was personal, touching and funny.  What a special day!  More on that later...

In the spring, Diana's bridesmaids and I threw a vintage Parisian themed bridal shower for her.  We went back and forth on the theme, but since D and D got engaged in Paris, we decided on that for our theme.  Here is a link to our Pinterest page, which provided our inspiration:

http://pinterest.com/mellowlane/d-s-shower/

We started by deciding on our invitations.  We found these hot air balloon invitations on Etsy and fell in love with them.  We debated about having them be a bit more Parisian, but we loved the hot air balloon and decided it was travel-inspired and fit our theme well enough.

http://www.etsy.com/listing/84853996/vintage-feel-hot-air-balloon-bridal?ref=sr_gallery_17&ga_search_query=invitations+love+is+in+the+air&ga_view_type=gallery&ga_ship_to=US&ga_search_type=handmade

Kelly, the owner of the Etsy shop worked with us to create the format and wording we wanted and then emailed us the JPEG to print out ourselves.  It seemed a little flimsy, so we mounted them on two colors of paper.  Here is what we ended up with:


Sorry for the weird crop.  Didn't want my mom's address out there.  And now can we all just take a moment there and acknowledge the fact that I just uploaded a picture to my blog!!  Yea me!!!  My heart is still doing palpitations.  That was pretty exciting.  I feel like I've actually accomplished something today.  Wow.

The girls and I were on a pretty tight budget, so we tried to go as inexpensive as possible.  We had the party at two in the afternoon, so we did not serve a full lunch.  We did French munchies and desserts.  We did three French cheeses, purchased at Trader Joe's, fruit and two different crepes.


Dude!  Two pictures!  I'm blowing my own mind right now.  Our big food splurge was on French pastries.


I borrowed these cake stands from my friend Michelle.  She usually weaves a ribbon through the holes, but she suggested twine to go with our vintagey kind of feel.  It was perfect since I was using twine around the flower "vases."  (I'll show those in a minute.)

We also had a yummy mimosa bar, which was super fun!  I went to three different stores to find bottles to hold juice.  (I should also mention that I purchased bottles from all three stores, only to return the ones I didn't want.  It became an obsession.  It's not good.  I got these from Ross.  They have similar ones at Ikea, but they are more expensive.)


In looking at Pinterest, we found the idea of a "make your own perfume bar."  We loved this idea, thought it would work for different ages, and would be both an activity and a favor.  There are lots of different options out there, in different price ranges.


We used inexpensive maps from AAA as a tablecloth in case there were any spills.  And this table was a high, cocktail table, so people could stand to make their own perfumes.  Each guest had a bag stamped with an Eiffel Tower and "merci" and a tag with their name, also stamped with a French stamp.

For decorations, I sent out an email to a bunch of my friends and they brought over anything Parisian that they had laying around the house.  We used them all over.  Here's the backdrop to our food table.  (The food table, by the way, is my mom's ping pong table, with half left folded up.  It makes for an awesome buffet table.


My parent's neighbor flies the French flag every year on Bastille Day, so we happily snatched that up.

We also printed out a bunch of engagement photos of D and D as well as pictures that Diana took on their trip to Paris.  We hung them up using twine and clothespins.  (Actually my dad pinned them up.  Yea Dad!)


Most of our decoration budget and time was spent on flowers.  We went to the Los Angeles flower mart the day before to buy flowers.  I already had these metal containers, which I've used as planters.  Some things I replanted.  Some of the containers were already empty.  Upon emptying them out, I discovered that we had drilled holes in the bottoms to let water flow out, which of course is so not convenient for cut flowers.  We ended up putting different sized Tupperware containers in the bottom of the containers to hold the water.  The idea was that this would look like a French flower market.  We were pretty happy with the results, and buying larger, less expensive flowers in bunches saved us a lot of money.


We also needed flowers for the tables.  I found a whole bunch of vintage French labels from The Graphics Fairy and they inspired the table arrangements.  Here's a link to one of those, but there are tons of others, too.

http://graphicsfairy.blogspot.com/2011/05/vintage-graphic-image-round-french-soap.html

I took my empty jars, in different sizes, which I use all the time for holding nuts, trail mix, raisins, chocolate chips, etc.  I had already removed their original labels.  (Sometimes it takes a little nail polish remover or rubbing alcohol to get all the glue off.)  Then I printed the labels in different sizes for the different jars.  I attached them with homemade Mod Podge.  I found the recipe for that here:

http://doityourselfdivas.blogspot.com/2011/09/diy-mod-podge.html

Then we tied each one with twine and filled them with flowers.  We placed three at each table in varying heights.  I think they looked gorgeous and were a huge hit.  AND, other than the flowers, they were practically free.  I had all the materials already.


We also used one type of flower per jar.  Flower arranging is not my strength and I find that grouping flowers by type eliminates some of that problem.

It was a great day, filled with yummy treats, beautiful flowers, old and new friends and, most importantly, a lot of love for Diana.

Going to hit publish now.  Cross your fingers that this actually works.  If not, my computer may get thrown across the room.